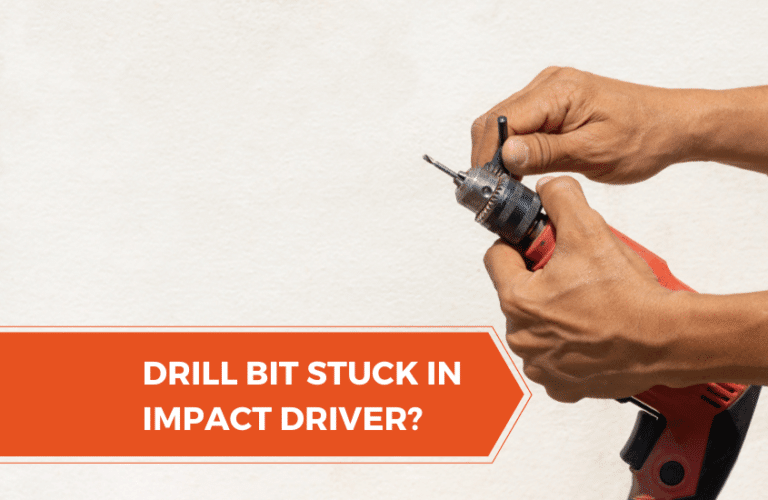
Drill Bit Stuck in Impact Driver – Easiest Solutions to Get Rid of It!

Things may get even worst when you go to use your newly-purchased impact driver, and you notice a piece of drill bit has just got stuck in your power tool! Damn, what an awkward situation it is!
Unfortunately, most of you don’t know why a drill bit stuck in an impact driver and how to solve this bummer! From choosing the wrong piece of bit to set it up inappropriately, there are a couple of reasons why you’re going through such annoying situations.
So here, I’ve come up with a few solutions to help you out. First, I’ll make sure you become able to remove a stuck-on drill bit from your power tool! Whether you’re operating an impact driver of Makita, Dewalt, Milwaukee, or anything else, my handpicked techniques can be applied for almost every top-notch model, guaranteed!
Why Does a Drill Bit Gets Stuck In Impact Driver – 4 Probable Reasons behind It
Before you know how to remove stuck drill bit from impact driver, the first and most important thing is to look for the probable reasons why it gets stuck. Unfortunately, there are so many reasons!
- Reason-1: Many people don’t focus on oiling the chuck properly, but it’s indeed one of the major reasons behind a stuck drill bit. Frequent oiling makes it way better to both slide out and slide it with a bit of drill.
- Reason-2: Probably, the chuck becomes overly tight due to the excessive vibration that occurs while drilling more often. At that time, you’ll notice the drill bit gets stuck, and you’re unable to get it out!
- Reason-3: Lack of maintenance is another common reason. An Impact driver requires to be cleaned up after a certain period. If not, the accumulation of dust gets higher and results in jamming.
- Reason-4: Don’t prove yourself foolish by using inappropriate drill bits for your impact driver! I’ve seen a lot of people who made the serious mistake of using the wrong bits and ended up getting stuck in an impact driver.
How to Get Stuck Bit Out of Impact Driver – 2 Effective Methods!
Let’s cut to the chase! Once you’ve learned some of why a drill bit is stuck in an impact driver, it’s time to learn how to remove the bit from the impact driver with ease and quick. It’s going to be easier than you think about, trust me!
Method-1: Using Pliers
- Step-1: A pair of pliers will play a significant role in gripping the bit firmly so that you can turn the stuck-on bit anticlockwise.
- Step-2: Don’t push or pull using your whole strength! Try to be as gentle as possible while performing the task to take it off smoothly.
- Step-3: Releasing minimal pressure will be required on that piece of bit, and that’ll let you take off the drill bit much safely from your impact drive. Once again, if you provide too much pressure on it, the bit may get broken inside of the chuck, keep in mind!
Method-2: Using Wires!
Some low-end drill bits might get easily stuck in your impact driver. In this case, you can take assistance from a piece of wire to get rid of it; you heard it right!
So let’s see how the task can be performed:
- Step-1: Grab that piece of wire you’ve collected to get the job done.
- Step-2: Pull the wire a little back and wrap it around the chuck as firmly as possible.
- Step-3: Once you see the wire is strongly holding the mouth of the impact driver, all you need to do is pull the drill bit, and Voila! It came out, and that was easier than it sounds, wasn’t it?
Note: Let it be an impact driver of Dewalt, Makita, Milwaukee, Ryobi, or Ridgid; the technique can be applied for all. Watch it to get practical knowledge on how to remove a stuck drill bit from an impact driver
How to Get Drill Bit Out of Dewalt Impact Driver – Follow the 3 Basic Steps:
I’ve seen many people online asking about how to remove the bit from the Dewalt impact drill. Well, you’re getting the answer just from here:
- Step-1: Get the chuck as loose as possible.
- Step-2: Take one of your hand’s assistance to hold up the chuck. Similarly, use another hand to grab the handle firmly.
- Step-3: Be sure you’re turning the chuck anticlockwise, preferably to the left side, while losing it. By doing so, you’re allowing the jaw to get opened, and this will enable you to take off the drill bit from your Dewalt impact driver.
How to Change Drill Bit Dewalt?
- Step-1: Grasp the chuck right away using nothing but your hands.
- Step-2: Turn it anticlockwise to take it off from your impact driver.
- Step-3: Get your hands on the right piece of drill bit that suits your Dewalt. You can take the manufacturer’s help or can do your research online.
- Step-4: Insert the bit into the hole, and then turn the chuck in the opposite direction to make it tighter. Could you turn on the switch, and wow, you did it?
Note: Click here to get a practical idea on changing drill bits, Dewalt.
How to Get a Drill Bit Out of a Makita Impact Driver – Follow the 3 Basic Steps:
How to remove a stuck bit from a makita impact driver? If you’ve ever had to take apart a drill bit from your Makita impact driver, then you know how frustrating it can be. Fortunately, there are three easy steps to fix this problem.
- Step-1: Spray some WD40 in the chuck
- Step-2: Grab the bit with a pair of pliers
- Step-3: And run your Makita forward and backwards until it comes loose. Usually works every time.
Note: Click here to get a practical idea on changing drill bits, Makita.
Conclusion
You’ve got plenty of ideas on why a drill bit stuck in an impact driver and how to get rid of it! Although it sounds so complicated to most of you, I’ve made the whole task a breeze through this single post. And I hope you’ll benefit from applying my above-written techniques.
Try this out, and you’ll thank me later!