Circular saws are power tools commonly used for cutting various materials, including wood, metal, masonry, and more. The tool consists of a circular blade that rotates around an arbor and is powered by an electric motor. The blade is mounted on a metal shoe that can be adjusted for the depth of cut and angle, allowing the user to make various cuts.
Milwaukee Fuel circular saws are high-performance power tools designed for professional use. These saws feature a brushless motor and REDLITHIUM battery technology, which provides extended run time and efficient power delivery.
They also come equipped with RedLink Plus Intelligence, which helps to optimize the tool’s performance and protect it from overloading, overheating, and over-discharging. The Milwaukee Fuel circular saws come in two sizes, 7-1/4 inch, and 6-1/2 inch, with different cutting capacities, weights, and other features, making them ideal for a wide range of cutting tasks.
Key Differences Between 7-1/4 inch and 6-1/2 inch Milwaukee Fuel Circular Saws
Here is a comparison table between the Milwaukee Fuel 7-1/4 inch circular saw and the 6-1/2 inch circular saw:
| Feature | Milwaukee Fuel 7-1/4 inch | Milwaukee Fuel 6-1/2 inch |
| Blade size | 7-1/4 inch | 6-1/2 inch |
| Cut capacity | 2-3/8 inch at 90 degrees, 1-7/8 inch at 45 degrees | 2-1/8 inch at 90 degrees, 1-5/8 inch at 45 degrees |
| Power | Brushless motor | Brushless motor |
| Weight | 9.0 lbs | 6.8 lbs |
| Features | RedLink Plus Intelligence, REDLITHIUM battery technology | RedLink Plus Intelligence, REDLITHIUM battery technology |
As you can see, the main difference between the two saws is the size of the blade and the cutting capacity, with the 7-1/4 inch saw having a slightly larger blade and more cutting capacity.
Both saws feature a brushless motor and REDLITHIUM battery technology, which provides long run time and efficient power delivery. The 7-1/4 inch saw is also slightly heavier than the 6-1/2 inch saw.
Blade Size and Cutting Capacity
The blade size and cutting capacity of circular saws play a crucial role in determining their performance and versatility. In the Milwaukee Fuel circular saws case, the 7-1/4 inch model features a larger blade size than the 6-1/2 inch model. This means that the 7-1/4 inch model can make wider cuts but may need to be more maneuverable for cutting in tight spaces.
In terms of cutting capacity, the 7-1/4 inch Milwaukee Fuel circular saw is capable of making deeper cuts, with a maximum cutting depth of 2-3/8 inches at 90 degrees and 1-7/8 inches at 45 degrees. The 6-1/2 inch model, on the other hand, has a slightly smaller cutting capacity of 2-1/8 inches at 90 degrees and 1-5/8 inches at 45 degrees.
Power and Efficiency
The power and efficiency of a circular saw are crucial factors in determining its performance and overall capability. In the case of the Milwaukee Fuel circular saws, both the 7-1/4 inch and 6-1/2 inch models are powered by brushless motors and equipped with REDLITHIUM battery technology, which provides long run time and efficient power delivery.
The 7-1/4 inch Milwaukee Fuel circular saw delivers up to 15A of power, while the 6-1/2 inch model delivers up to 12A. This means that the 7-1/4 inch model can handle heavier-duty cutting tasks, while the 6-1/2 inch model is better suited for lighter-duty cutting tasks.
Additionally, both saws feature RedLink Plus Intelligence, which optimizes performance and protects the saw from overloading, overheating, and over-discharging. This results in increased efficiency, improved runtime, and extended tool life.
In terms of power and efficiency, the choice between the 7-1/4 inch and 6-1/2 inch Milwaukee Fuel circular saws will depend on the specific cutting tasks at hand. The 7-1/4 inch model offers greater power for handling heavier-duty cutting tasks, while the 6-1/2 inch model is a more compact and efficient option for lighter-duty cutting tasks.
Weight and Dimension
The weight and dimensions of a circular saw play a crucial role in determining its maneuverability, portability, and overall ease of use. In the case of the Milwaukee Fuel circular saws, the 7-1/4 inch model weighs in at 9 lbs, while the 6-1/2 inch model weighs in at 6.8 lbs. The 7-1/4 inch model is thus slightly heavier, but still relatively lightweight for a saw of its size and capabilities.
In terms of dimensions, the 7-1/4 inch Milwaukee Fuel circular saw measures 13.1 in x 10.1 in x 10.8 in, while the 6-1/2 inch model measures 11.2 in x 9.6 in x 9.9 in. The smaller size of the 6-1/2 inch model makes it easier to maneuver and use in tight spaces, while the larger size of the 7-1/4 inch model allows for a more stable cutting platform.
Cutting Depth and Dust Port
The cutting depth and dust port are important features to consider when choosing a circular saw, as they can greatly affect the saw’s performance and versatility. The Milwaukee Fuel circular saws, the 7-1/4 inch model, has a maximum cutting depth of 2-7/16 inches at 90 degrees and a 1-7/8 inch cutting depth at 45 degrees.
Meanwhile, the 6-1/2 inch model has a maximum cutting depth of 2-1/8 inches at 90 degrees and a 1-5/8 inch cutting depth at 45 degrees. Both saws also come equipped with a dust port, which helps to manage sawdust and debris during cutting operations.
The dust port helps to increase visibility and reduce the amount of airborne sawdust, which can improve the overall safety and cleanliness of the cutting environment.
Battery and Battery Life
The Milwaukee Fuel circular saws are cordless saws powered by M18 RedLithium batteries. The 7-1/4 inch model and the 6-1/2 inch model both use the same type of battery, but the 7-1/4 inch model is slightly more powerful and therefore requires a larger battery.
As a result, the battery life of the 7-1/4 inch model may be slightly shorter than that of the 6-1/2 inch model. However, both saws can be powered by any M18 RedLithium battery, so it is possible to swap batteries between saws if necessary. Additionally, both saws feature a battery gauge that displays the remaining battery life, so you can easily track the status of your battery during use.
Other features
In addition to the previously mentioned features, both the Milwaukee Fuel 7-1/4 inch and 6-1/2 inch circular saws have several other notable features, including:
LED Light: An integrated LED light helps to illuminate the cutting area for improved visibility.
Electronic Brake: An electronic brake stops the blade quickly after the trigger is released for added safety.
Tool-Free Adjustments: Tool-free bevel and depth adjustments allow for quick and easy cuts without needing additional tools.
Ergonomic Design: An ergonomic design with a rubber grip and low-vibration operation makes the saws comfortable for extended periods.
Brushless Motor: A brushless motor provides more power and longer life than traditional brushed motors.
Overall, the Milwaukee Fuel 7-1/4 inch and 6-1/2 inch circular saws offer a combination of power, versatility, and user-friendly features that make them ideal for a wide range of cutting tasks.
Final Words
In conclusion, the Milwaukee Fuel 7-1/4 inch and 6-1/2 inch circular saws are top-quality cutting tools that offer excellent performance and a range of features designed to make your work easier and more efficient. Whether you are a DIYer, a professional carpenter, or simply someone who needs a reliable saw for occasional use, either of these saws is an excellent choice.
The main differences between the two saws lie in their blade size, cutting depth, power, weight, and battery life, so it’s important to consider your specific needs when choosing between them. The 7-1/4 inch saw is the better choice if you need a larger blade size and more cutting depth. On the other hand, if you prefer a lighter, more compact saw with longer battery life, the 6-1/2 inch saw may be the better option.
If you’re in the market for a torque wrench, you may wonder which size is best for you. Torque wrench 1/2 vs. 3/8 – both sizes have pros and cons, and deciding which one to buy can be tough. In this blog post, we will discuss the differences between torque wrenches 1/2 vs. 3/8 so that you can decide which size is right for you.
What Is The Difference Between 1/2 And 3/8 Torque Wrench?
Here’s a quick rundown of the differences between 1/2 and 3/8 torque wrenches.
Size
The most apparent difference between the two is their size – a 1/2-inch torque wrench is more significant than a 3/8-inch torque wrench, meaning that it can provide more leverage and power when loosening or tightening nuts and bolts.
Power
Along with size comes power. A 1/2-inch torque wrench has more power than a 3/8-inch one, making it better for more extensive and more challenging fasteners.
Torque Range
The range of torque that can be applied to a nut or bolt is different between the two – a 1/2 inch torque wrench typically has a higher range (up to 150 ft-lbs), while the 3/8 inch usually ranges from 10 – 80 ft-lbs.
Capacity
A 1/2-inch torque wrench typically has a higher capacity than its 3/8 counterpart, allowing you to work with heavier components such as engine blocks or large machinery parts. On the other hand, if you are looking for a tool to work with small components like screws and fasteners, then a 3/8-inch torque wrench may be more suitable for your needs.
Accuracy
Generally speaking, torque wrenches in either size are designed to be accurate. However, due to its larger size, a 1/2-inch torque wrench will typically be more accurate than a 3/8-inch torque wrench.
Cost
In general, 1/2-inch torque wrenches tend to cost more than 3/8-inch wrenches. This is because they are larger and have higher capacity, meaning they can handle heavier components with greater accuracy and precision.
Versatility
A 1/2-inch torque wrench is more versatile than a 3/8-inch one, as it can be used for various applications due to its increased power and capacity. On the other hand, a 3/8 inch torque wrench may be suitable for lighter tasks such as assembling bicycles and small machinery.
Maintenance
A 1/2-inch torque wrench requires more maintenance than a 3/8-inch one, as the larger size makes it more prone to wear and tear. Therefore, if you plan on using your torque wrench for extended periods or under challenging conditions, a 1/2-inch torque wrench may be a better investment.
Is A 3/8 Torque Wrench Better Than A 1/2?
A 3/8 and 1/2 torque wrench are standard sizes that offer different benefits for various applications. Which one is better for you depends on the job at hand.
When it comes to general use, a 1/2 torque wrench will generally provide more accuracy and consistency than a 3/8 torque wrench due to its larger size. However, this also means that a 1/2 torque wrench is heavier and awkward to use in tight spaces. That’s where the smaller 3/8 torque wrenches come in — they’re lighter, easier to handle and can get into those hard-to-reach areas.
For tasks requiring high accuracy but little mobility (such as bolting down a car engine or working on bicycles), the 1/2 torque wrench is probably the best choice. It provides greater control and precision due to its larger size. On the other hand, 3/8 torque wrenches are excellent for applications where mobility and convenience matter more than accuracy, such as when assembling furniture or tightening smaller bolts.
Ultimately, deciding between a 3/8 torque wrench and a 1/2 torque wrench ultimately comes down to what you’re trying to accomplish and your preference. If you need higher accuracy in a small space, then a 3/8 is your best bet; if you need more precision but have plenty of room to work with, stick with the 1/2. Whichever one you choose, make sure to use it correctly for the best results.
Which One Is Better For The Average Person?
For the average person, a 3/8 torque wrench is usually better than a 1/2. It’s lighter, easier to use in confined spaces, and has plenty of accuracy for everyday tasks such as changing car tires or tightening bolts around the house.
However, a 1/2 torque wrench may be your best bet if you’re doing something more specialized and requiring higher precision. Ultimately, it all comes down to personal preference and the job. Whichever one you choose, make sure to use it correctly for the best results.
Final Thoughts
When deciding which type of torque wrench to buy, it is essential to consider the specific needs you have for your projects. 1/2-inch torque wrenches are an excellent choice for larger jobs requiring more power and strength, while 3/8-inch torque wrenches are a better option for smaller tasks and spaces requiring precision and accuracy.
No matter which size tool you choose, make sure you take the time to properly calibrate it before each use so that you can guarantee accurate results every time. With the proper knowledge and tools, any project is possible.
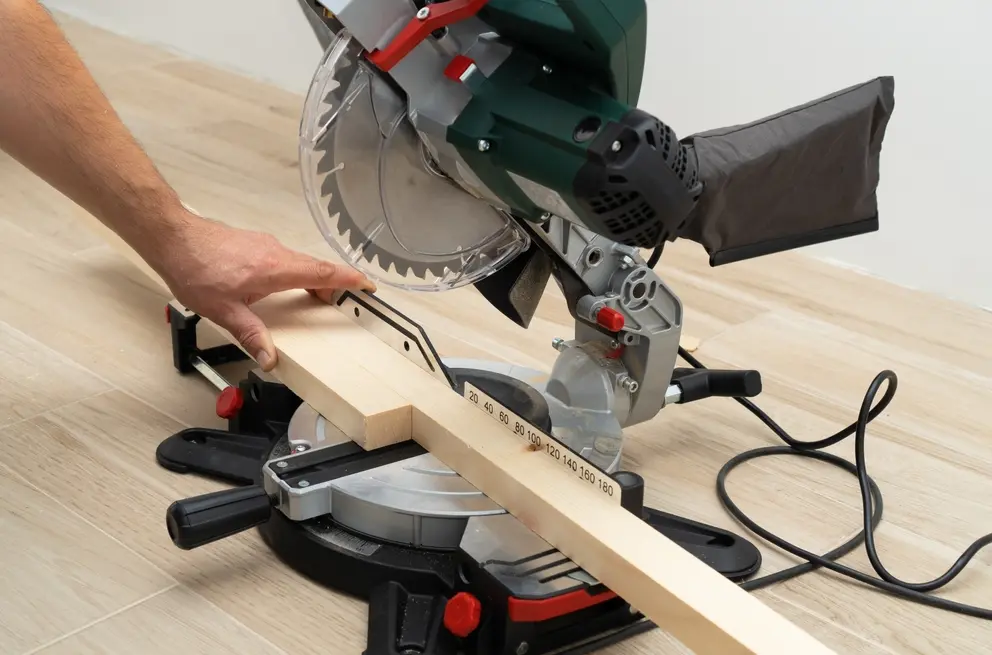
Miter saws are a must-have for any serious DIYer or contractor. They are essential for making quick, accurate cuts. When it comes to miter saws, there are two main types: standard and sliding.
A standard miter saw has a fixed arm, while a sliding miter saw has an arm that slides out, allowing longer cuts. This article will discuss the pros and cons of the 7 1/4-inch miter saw and help you decide if it is worth the investment!
Why Buy a 7 1/4 In Miter Saw?
The 7 1/4-inch miter saw is ideal for most DIYers and contractors. It’s small enough to fit in tight spaces but powerful enough to make quick, accurate cuts. This size miter saw also can make bevel and compound cuts easily with its adjustable settings.
Additionally, the 7 1/4-inch size can handle relatively large pieces of wood—up to 8 inches wide—making it great for larger projects.
What Can You Cut With a 7 1/4 Miter Saw?
A 7 1/4 miter saw is a versatile and powerful tool that can be used for various cutting tasks. It is beneficial for making angled cuts, such as those needed when creating picture frames or crown molding.
The smaller size of the 7 1/4 miter saw also makes it ideal for jobs where space is at a premium, such as in workshops with limited floor space.
With its ability to make precise crosscuts, compound cuts, and angles, the 7 1/4 miter saw quickly trimmed boards to length. Its excellent accuracy means it can easily accomplish intricate projects like cabinetry or window casings.
And because this saw has many features like adjustable stops and blade guards, it can help you make safe and precise cuts.
The 7 1/4 miter saw is great for cutting wood and can also be used to cut various other materials like aluminum or PVC. The saw’s small size makes it ideal for cutting smaller pieces of these materials that would otherwise require specialized tools. Having this ability in a single tool means you can save time, money, and space.
All in all, a 7 1/4 miter saw is an excellent choice if you need a powerful yet compact tool for making quick and accurate angled cuts on wood or non-wood materials. It’s worth the investment if you’re looking for greater accuracy and efficiency in your projects. With its many features, you’ll be able to make quick work of even the most complex cutting tasks.
How Big Can A 7 1/4 Miter Saw Cut?
A 7 1/4 miter saw can make cuts up to 6.75 inches wide and 4.5 inches deep, enough to cut through most lumber sizes and more extensive materials such as doors. It has a bevel capacity of 0° – 45° with positive stops at 22.5° and 33.9° that lets you make angled cuts quickly and accurately.
That makes it the perfect tool for making frames, trimming doorways, or working on any woodworking project that requires precise angles or measurements.
What Are The Downsides?
Unfortunately, the 7 1/4-inch miter saw does have a few drawbacks. First, these types of saws are limited when cutting more comprehensive pieces of lumber than 8 inches. You may need to look into a larger miter saw to cut more extended pieces.
Additionally, the 7 1/4-inch size does not support angled cuts on longboards. Also, this size saw can’t cut a 4×4 in one pass due to the blade size. You’ll likely need to use a different type of saw for those projects.
Should I Buy a 7 1/4 In Miter Saw?
Whether or not a 7 1/4-inch miter saw is worth it depends on your needs. If you’re looking for a powerful tool to make accurate cuts in tight spaces and smaller pieces of wood, this size miter saw could be right for you.
However, a larger miter saw might be best if you’re cutting more significant pieces of lumber or angles on longer boards. Ultimately, it’s up to you to decide if the 7 1/4-inch miter saw suits your projects.
Final Words
A 7 1/4-inch miter saw is excellent for making quick and accurate angled cuts. It’s great for trimming boards to length, working on cabinetry or window casings, and cutting aluminum or PVC materials. Plus, its small size makes it ideal for use in tight spaces where larger saws wouldn’t fit.
Whether or not this size saw is worth the investment depends on your needs. But if you need a powerful yet compact saw with many features to help you make precise cuts, then it’s worth considering!
Clay pipe cutting can be a complicated process without the right tools. Many people try to cut clay pipes with a standard grinder, often leading to broken blades and frustration. This article will discuss a better way to cut clay pipe using an angle grinder. With the right blade and technique, you can easily cut through clay pipes without any problems!
Cutting Clay Pipes With An Angle Grinder
If you’re cutting through a lot of clay pipe, or if the pipes are particularly thick, you may need to use an angle grinder. Here’s how to do it:
Step: 1
Choose the right blade for your angle grinder. There are special blades that are designed for cutting clay pipes. Be sure to select a blade that is the correct size for your grinder.
Step: 2
Mark the pipe where you need to cut. Use a pencil or marker to draw a line on the clay pipe. This will help you keep track of your cutting progress.
Step: 3
Start cutting along the marked line. Apply gentle pressure as you move the blade along the pipe. You may need to make several passes with the blade to cut through the clay pipe entirely.
Step: 4
Remove any sharp edges from the cut pipe. Once you’ve cut through the clay pipe, use a file or sandpaper to remove any sharp edges from the surface of the pipe. This will help prevent injuries when handling the pipes.
And that’s it! With the right tools and technique, cutting clay pipes is a breeze. Be sure to follow these steps the next time you need to cut through clay pipes. You’ll be glad you did!
How To Cut Clay Sewer Pipe With Angle Grinder?
An angle grinder is the best tool for the job if you need to cut a clay sewer pipe. This type of cutting requires a lot of precision, so it’s essential to have a steady hand and a sharp blade. Here are some tips on how to safely and effectively cut clay sewer pipe with an angle grinder:
- Wear protective gear, including gloves, goggles, and a dust mask.
- Mark the cutting line on the pipe with a pencil or chalk.
- Position the angle grinder, so the blade is perpendicular to the cutting line.
- Slowly and carefully guide the blade along the cutting line. Avoid applying too much pressure, which can cause the blade to break or slip.
- Once the cut is complete, use a file or sandpaper to smooth any rough edges.
What Type Of Blade To Cut Clay Pipes?
If you’re cutting clay pipes with an angle grinder, using the correct blade type is essential. Most people will tell you that cutting clay pipes with an angle grinder is possible, but the truth is that it’s not the best tool for the job. The problem is that clay pipes are very fragile, and if you’re not careful, you can easily break them. That’s why we recommend using a diamond blade instead.
A standard cutting blade will quickly become dull and unable to make a clean cut. Instead, you’ll need to use a diamond-tipped cutting blade. These blades are specifically designed for cutting hard materials like clay pipes.
Final Words
Diamond blades are specifically designed to cut through rigid materials like concrete and brick, so they’ll have no trouble cutting through your clay pipe. Plus, they’re much more durable than regular blades, so you won’t have to replace them often. In short, they’re the best tool for the job and will help you get the job done quickly and efficiently. Thanks for reading!
Tile cutting can be a very tedious and time-consuming process. If you do not use the correct blades for cutting Porcelain tile, there is a huge possibility of wasting a lot. But the right one for the job can make all the difference and prevent unnecessary damage.
In this case, you can choose the best angle grinder blade for cutting porcelain tile because it tends to be sharper enough with a lot of cutting power.
There are many different types of angle grinder blades available on the market. So how do you get the best saw blades for you? Don’t worry; I’ve already worked hard to find a few best blades suitable for cutting porcelain tile with an angle grinder. So, let me cut to the chase without wasting any more time!
10 Best Angle Grinder Blade for Cutting Porcelain Tile
After hours of research, I am here to share my experience with some of the best angle grinder blades for you. I arrange all the best items right here so that you do not have to spend extra time here and there in terms of collecting the best ones. Are you ready?
Our Top Picks
1. EZARC 4-1/2 inch Diamond Blade

Specifications
- Made with high-quality alloy steel
- It comes with an X-Teeth design
- The weight is 8.47 Ounces
- The size is 5.7 x 4.9 x 0.39 inches
If you own an angle grinder and are looking for a way to reduce the time for cutting tiles, consider purchasing these diamond saw blades from EZARC. These 4-1/2 inch diamond blades explicitly designed for angle grinders can quickly and easily cut ceramic, granite, marble, and concrete without needing additional heat or power.
The Ezarc Company is one of the most well-known manufacturers with decades of experience creating durable, high-quality diamond blades. Ezarc creates products for those worldwide who wish to quickly and easily cut through the hardest of materials.
Pros
- It produces a super-smooth finish.
- Rates are high in performance compared to similar items.
- The blades contain excellent cutting results.
- Includes durable diamonds.
Cons
- Basic blade box that shows no professional appearance or design.
2. Tanzfrosch 4.5 inch Diamond Saw Blade for Cutting Porcelain Tiles

Specifications
- Made with Marble material.
- The dimension is 6.85 x 6.3 x 1.06 inches
- Its weight is 10.55 Ounces
- The Blade is compatible with Marble and Porcelain
Are you looking for an effective cutting tool to work on your home renovations? Tanzfrosch Diamond blades can handle tough materials to the extent of their abilities. It depends on the size of the Blade.
The 4.5-inch cross-cut diamond blade has enough force to let you cut through whatever material you want.
Honestly speaking, this Tanzfrosch diamond blade is more efficient and provides smoother cuts. You may want to consider the thickness and density of the surface you’re cutting through if your diamond saw Blade isn’t up for it. This Blade is highly durable and provides clean cuts due to its high-end steel material.
Pros
- The product is incredibly affordable
- Durable steel body with embedded diamonds.
- Comes with tough, sturdy materials.
- Interlocked diamonds ensure continuous cuts.
- A larger surface area provides greater stability.
Cons
- The Blade may not be conducive to quick cuts.
3. DEWALT Diamond Blade for Porcelain Tile, Wet/Dry, 4-1/2-Inch

Specifications
- Made with Diamond material
- It weighs only 0.31 Pounds
- The dimension is 7.52 x 5.71 x 0.43 inches
- The compatible material is Porcelain
What next? The following presentation is DEWALT Diamond Blades. It provides fast, long-lasting cutting and grinding performance on flooring materials such as porcelain tile. You can call it one of the best grinder blades for cutting porcelain tiles, granite, marble, and other hard-to-cut materials.
The unique blade design has a built-in lower percentage of diamond concentration to cut and grit preservation.
This Dewalt blade can be used for wet or dry on all stone flooring types. This 4 1/2″ diamond blade is designed for jobs like stripping floors or removing grout from old tiles. Besides, this Blade will save you time by cutting through hard materials and creating a lasting, smooth finish.
Pros
- Ideal for use on all types of natural stone.
- Easy to use.
- Durable and sharp.
- Cones at an affordable price.
- It provides smooth cutting.
Cons
- The Blade is cheaply made and does not have a guard.
4. 4 in Diamond Saw Blade Super Thin Porcelain Blade

Specifications
- The dimension is 4.49 x 4.49 x 0.79 inches
- It provides 16 ounces weigh
- It comes from diamond material
- Compatible with Marble and Porcelain Material
If you want something incredibly thin and flexible for delicate work, this Blade can be a perfect grinder blade for porcelain tile. It is a super-thin blade that is made to help the Blade take off precise and accurate cuts without causing any chipping or cracking so you can get the most out of your tile.
Any more features? Yes, this Blade’s nice, gentle curve separates it from other diamond blades in its category. It eliminates the need for an excessive amount of pressure. A perfect saw blade for cutting thin tiles is difficult, but this diamond blade can cut very thick tiles. This is one of the ideal porcelain tile grinders. The sharp diamond teeth on these blades do an excellent job of penetrating.
Pros
- This Blade is thin and flexible.
- Provide less chipping.
- Comes with a pretty clean cut.
- It provides longer handling time.
Cons
- If the Blade comes to water or moisture, it can rust.
5. Diapro 2 Pack-4.5″ Tile Blade Diamond Porcelain Blade

Specifications
- Made with diamond material
- Compatible with Porcelain and Marble
- It comes with 10.23 Ounces weigh
- The dimension is 6.3 x 4.65 x 0.28 inches
The Diapro tile blade is perfect for porcelain tile cutting disc that cuts, grinds, and notches Porcelain and other hard materials. It is also used with granite or marble to cut rough surfaces and break out small pieces of such materials.
The 4.5″ tile blade comes with a full diamond segment face and contains three individually cast, heat-treated, and stress-relieved steel layers.
Each Blade is dynamically balanced to reduce vibration. Our edges feature the superior Snap-It Blade Retention System that provides fast, convenient tool-free blade changes. If you ask me what is the unique feature of this item?
Last but not least, it uses a locking shoulder behind the Blade.
Pros
- Provide a perfect cut without scratching the tile.
- The Blade is excellent, with good steel.
- This Blade cuts Porcelain very well.
- It provides very fast cutting.
- The Blade is flexible.
Cons
- The Blade may not be able to cut smoothly.
6. Tysun 5 Pcs 4.5 inch Diamond Saw Blade

Specifications
- It is made of Diamond.
- The weight of this Blade is 1.1 Pounds.
- This blade dimension is 5.08 x 4.96 x 0.91 inches.
- Ideal for Marble, Stone, Ceramic, and Porcelain
Then comes the Tysun 5 Pcs 4.5 inch Diamond Saw Blade. The blades represent the highest precision and quality in mind. So it can provide ultimate efficiency in grinder porcelain cutting discs without difficulties.
The best thing about this product is that it is extremely lightweight at the same time, you can use it comfortably. This Blade also gives you decent results in terms of accuracy and precision when cutting the tiles. It also comes with a safety guard to prevent accidents with slippery tiles.
Pros
- The Blade is very lightweight.
- Its design comes with quality material.
- This product is very durable as well as has high precision.
- The Blade comes with a safety guard.
- Perfect for cutting various types of tiles without any difficulties
Cons
- The Blade does not have a long handle
- It can easily damage due to careless cutting
7. Diapro 10″ Diamond Tile Saw Blade Super Thin

Specifications
- Made from ceramic material.
- It is compatible with Stone and Porcelain
- The blades contain 1.7 Pounds of weight.
- The dimension will be 12.28 x 11.02 x 0.28 inches.
Take a Diapro 10″ Saw blade and eliminate your need for a large, expensive wet saw to cut porcelain tiles at a fraction of the cost! The Diapro 10 Diamond Tile Saw Blade is 100% diamond, cutting through porcelain tiles like butter.
According to my experience, this Blade is also super thin, allowing you to easily cut tiny intricate designs into your tiles. This Blade also has an excellent life span, and you can re-sharpen it indefinitely.
Besides, these blades are available in different shapes to suit your needs. Whether cutting a small or large area, this diamond tile saw Blade would fit any job. You can cut large tiles with these thin, flexible blades.
I’d recommend having at least two of these diamond tile saw blades to complete any large tile project.
Pros
- It provides durability and silence.
- The Blade represents good performance.
- It comes with a very smooth cut.
- Fast cut in wet or dry tiles.
- It is affordable and simple to use.
Cons
- The Blade is a little bit too thick.
8. Makita 2 Pack – 4″ Continuous Diamond Blades

Specifications
- Comes with Alloy Steel
- It provides a weight of 0.05 Pounds.
- The compatible materials are Glass, Porcelain, Ceramic, and tone.
- The dimension is 4 x 0.79 x 4 inches
As we all know, Makita is one of the best brands for devices for porcelain tile cutting blades and trimming metal, doors and windows, insulation, and other materials. So, the Blade is from Makita. This Blade uses high-quality materials to deliver an edge that cuts from top to bottom. The continuous diamonds cut through these surfaces with exact precision.
This saw blade is affordable and comes with a 20mm arbor that can change easily within seconds. There is an ultra-thin kerf design that helps reduce wood waste and heat generated during cutting, prolonging the life of your Blade.
But it is suitable for various finishing tasks. Overall, I think this is a very good product and will last a long time.
Pros
- Cuts faster and cleaner than standard blades
- Connects to any 4″ grinder or circular saw.
- High-quality Blade for ceramic tile, Porcelain, and stone.
- It reduces wood waste and heat generated during cutting.
- Highly durable for heavy-duty cutting applications.
Cons
- The blades are a little bit expensive.
9. GoYonder 4.5 Inch Super Thin Diamond Saw Blade

Specifications
- Made from Diamond material
- It provides 45.28 x 45.28 x 0.05 inches Dimension
- The Blade is Compatible with Stone, Ceramic, Porcelain, and more
- The weight is 3.88 Ounces
If you’re a professional tile installer, you know the importance of getting the perfect cut on your tile. In this case, GoYonder’s 4 .5″ Super Thin Saw Blade will provide what you are looking for. If you take this item, you might not go wrong. It’s also easy to use and easy to clean.
The blades represent a diamond-like cutting surface that will cut through porcelain tiles and stoneware without ruining them. This material will last through many years of hard work without chipping or warping. The blades are made from high-quality steel and reinforced with a quality diamond coating.
Pros
- It stays sharp for a long period.
- Made from high-quality materials.
- Doesn’t chip or scratch porcelain or ceramic.
- It is thin and lightweight.
- Durable and long-lasting.
Cons
- It cannot work with larger tiles.
- A little bit pricey.
10. Super Thin Diamond Ceramic Saw Blade Porcelain Cutting

Specifications
- Made with Stainless Steel
- It weighs 2.33 Pounds
- The Dimension is 4.69 x 4.65 x 2.17 inches
- It is Compatible with Glass, Stone, Porcelain, and more
For cutting ceramic tiles, granite and Porcelain, this new diamond saw Blade offers a fast cutting speed and good dust-removing ability. It is made of high-quality stainless steel with tooth hardness. With the GoYonder Super Thin 4 Diamond Ceramic Saw Blade, you will find it easy to cut through any ceramic tile or stone.
As far as I know, this saw blade provides us with the highest quality diamond material. And it’s a certified high-grade diamond. You can trust them because this Blade is superior to any other brand you can find on the market. The blades use high-quality materials and pass strict inspection procedures.
Pros
- The Blade is a lot sharper than you expect.
- It will provide accurate cuts.
- Very easy to store.
- The Blade is durable.
- Made from high-quality diamond material.
Cons
- This diamond tile saw Blade is not suitable for high pressure.
Frequently Asked Questions (F.A.Q):
Can You Cut Porcelain Tiles With An Angle Grinder?
You can use your angle grinder to cut Porcelain tile in a couple of styles. When you use an angle grinder, it will be perfect for your circular cut or straight cutting.
How Do You Grind Porcelain Tile?
You can take a diamond grinder or a blade while cutting porcelain tile with a grinder. The diamond grinder is more expensive, but it is also more durable. This porcelain tile grinder is cheaper but may not be as durable.
Is It Possible To Grind Porcelain?
Porcelain tile is a wonderful choice when planning to upgrade your home. You may need to grind this tile to smooth out a surface that has been stained, shape the tile for installation, or use an angle grinder and porcelain grinding bit to do this.
Final Verdict!
That was everything on the best angle grinder for cutting porcelain tile. But if you ask me to choose only one, I’d love to go with the Diex 4″ Supper Thin Diamond Saw Blade. It has a sharp edge that will easily cut through the tile and is durable enough to handle frequent use.
On the other hand, if you are looking for an angle grinder blade that will help you quickly and easily cut through tile, the Dewalt Diamond Saw Blade is the perfect option!
Related Articles
Best 7 Inch Angle Grinder For Concrete
Can You Cut Aluminum With An Angle Grinder?
Milwaukee Vs. Dewalt Angle Grinder
Best Blade For Cutting Aluminum
Removing bits can be a piece of cake if you’re a seasoned carpenter or DIY-er. But when it comes to taking out bits from the Dewalt impact driver, I bet most of you will fail due to its complex mechanism.
So today, I’m here to discuss how to remove the bit from the Dewalt impact driver following the 6 specific steps. Alongside following the techniques I’ve mentioned here, you need to have some basic ideas on impact drivers, for which you can complete the task without any risk and hassle.
I’ll also add the necessary tools you may need to get the work done for your convenience. So this is going to be fun if you go through the entire article. Ready to dig in?
Things Required:
- Wrench/Pliers
- Screwdriver (flat-head)
- Kerosene/Oil (optional)
How to Remove Drill Bit from Dewalt Impact Driver
Now that you have collected the necessary tools and stuff, let’s cut to the chase by showing you how to get a bit out of a Dewalt drill without much effort:
Step-1: Power Off Your Driver
There is nothing alternative to switching off your impact driver for safety purposes before you get into the real action. If not, the device may start and result in severe accidental injuries.
Step-2: Getting the Wrench
Your next duty is to get a piece of a wrench to remove stubborn screws from the bit holder. Apply slow and steady movement and go for taking every little bit out of that place. Feel free to use pliers in place of a wrench if you don’t have an adjustable wrench near you.
Step-3: Using Extra Oil (If Needed)
I guess you might be unsuccessful at that time in removing a bit from your Dewalt impact driver. It happens when you tend to keep your impact driver left for an extended period after usage. So if it occurs, I’d suggest applying a certain amount of kerosene or oil to their walls.
Thus, you can get those metallic surfaces way smoother than before. And this will help you remove the bit from the Dewalt impact driver with ease and quick!
Step-4: Getting a Screwdriver
A flat-head screwdriver will help you turn those pesky-little nuts/screws anticlockwise to get them unscrewed. In this way, you’re allowed to take off the heads of your driver’s body.
Afterward, don’t hesitate to get those screws via pliers and pull them off carefully.
Step-5: Re-Inserting Screws
Now that you have removed the stuck bit from your Dewalt impact driver let’s re-insert the new ones. In this case, you need to locate yourself at the impact driver’s top end. And then, line up each screw correctly in its corresponding areas.
Let’s begin screwing your impact driver’s new bits clockwise to fasten them thoroughly. Keep on screwing till you find the bits tightly locked.
Step-6: Testing!
There is nothing wrong if you switch on your Dewalt impact driver right now for a test. If you notice that the machine is running smoothly, then congrats as you’ve done removing the bit stuck in the Dewalt impact driver.
Note: Watch this video for how to get a bit out of a Dewalt drill.
Wrapping It Up!
Pat yourself on your back as you have successfully removed the bit from your own driver. From switching off your impact driver to re-inserting screws, you need to follow every step mentioned above.
So hopefully, the write-up of how to remove the bit from the Dewalt impact driver helped you do that with minimal time and effort.
A 7 1 4 miter saw can do it all, from cutting aluminum to wider boards! That’s one of the key reasons behind its extensive popularity. With that being said, I’ve seen many people who don’t know what to choose! Yes, I’m talking about the specific brand as the current market has loaded tons of different choices with different specs.
So today’s topic is all about the comparison of Dewalt vs. Milwaukee 7 1/4 miter saw, including their noticeable differences and my top 2 pickings from both models.
To know which masterpiece brand deserves to get a place in your arsenal, let’s jump right into the details!
Milwaukee 7 1/4 Miter Saw vs. Dewalt: Detailed Comparison
The functionality of both Dewalt and Milwaukee 7 1/4 miter saw will be more than 80% similar. With that being said, they will be different from each other in terms of their features, brand, design, usability, and so forth.
So, to help you learn deeply about Dewalt vs. Milwaukee 7 1/4 miter, I’m going to present a comprehensive comparison right here down below. Let’s enjoy it!
Difference in Features
Many people interchangeably choose them before digging their features, but guess what? If you study properly, then you can observe a couple of differences between them. For instance, the beveling of Dewalt can be done at a degree of 45 and 90 (crosscut), while the Milwaukee is compatible with 48 and 45 degrees (dual bevel).
Furthermore, Dewalt stands out for its excellent accuracy, thanks to the cross-cut system with a blend of cutting line indications. On the other side, Milwaukee is known for its outstanding cutting performance since it can deliver no less than 600 cuts at a stretch!
Item Weight/Portability
No matter why you have chosen a 7 1 4 miters saw, it’s wise to pick the one that ensures maximum portability. You’ll find that easier to transfer from your home to your workstation in this you.
So, it’s a fact that the product should be lighter in weight. Fortunately, both deserve the gold standard due to their portable structure. But Milwaukee will indeed appear to be lighter in weight to maximize portability.
Variation in Design
Although each of these 7 ¼ miter saws is made of a combination of metal and plastic, you can still find differences in their overall design. Let’s say Dewalt is quite popular for its mind-blowing color blends of yellow and stainless steel. At the same time, Milwaukee, as usual, gets its standard Red and White color mixtures.
But when it comes down to the durability, I don’t think it’ll be fair to choose only one as the winner; ask me why? Because both manufacturers earned popularity for their durable 7 ¼ miter saws and other power tools.
Added Accessories
Unfortunately, none of them will give you an extra battery to operate your 7 1 4 miter saw. However, the Dewalt is one step ahead as it gives you several accessories additionally. This includes a Material Clamp, Blade Wrench, Carbide Blade, and a piece of the user manual.
Battery Voltage
Here comes another noticeable difference between the Dewalt and Milwaukee 7 1 4 miter saw. The Dewalt features a 20V lithium-ion battery, while the Milwaukee operates through an 18V Lithium-ion battery. Although the voltage difference isn’t that higher, you still may find the Dewalt comparatively more efficient than the Milwaukee, especially if you’re a pro carpenter.
Dewalt 7 1/4 Cordless Miter Saw Review – My Recommendation
Specifications:
- Requires a 20V Lithium-ion battery
- It weighs about 30.0lbs
- 4-inch blade length
- Measuring around 25.25 x 19.88 x 15.69 inches
If you ask me to pick up the best Dewalt 7 1 4 miter saw, I can easily rely on this one without even thinking twice! The standard 4” ultra-sharp blade, portable structure, and optimal accuracy level make it stand out from the crowd!
Thanks to the efficient “cross-cut” cut line system, The Dewalt DCS361B indicates that it requires no less adjustment at all. Thus, it ensures optimum visibility and precision at the same time.
To maximize your productivity, the maker of this model has added eleven positive stops. Alongside it, the overall adjustment of the bevel angle will be easier and more accurate; the credit goes to its bevel scale, which appears oversized.
Don’t worry about the portability; its 30lbs lightweight structure has covered you. Due to this, you will find it a lot easier to transfer from one place to another. I’ve found the structure quite compact as well, allowing you to keep it in small spaces without any hassle.
Last but certainly not least, the built-in miter handle (cam lock) lets you enjoy precise and fast miter angles.
Highlighted Features:
- Features cross-cut system with a cutting capacity of 8 inches
- Compatible with 45 and 90-degree crosscutting angle
- Eleven positive stops enhance overall productivity
- Includes Material Clamp, Blade Wrench, and Carbide Blade additionally
- It comes in an over-sized bevel scale for more accurate and easier bevel adjustment
Pros
- Relatively compact and gets a lightweight frame
- Quite functional and able to make cross cuts with ease
- Able to make cuts so precisely yet quickly
- Perfect for DIY-yers and experts
Cons
- It might take a bit more time to change the blade!
Milwaukee 7 1/4 Miter Saw Review – My Recommendation
Specifications:
- Needs an 18V Lithium-ion battery
- Weighs only around 28.0 pounds
- 4-inch blade length
- Measuring about 24.8 x 16.14 x 25 inches
So, do you want to have a 7 ¼ miter saw that can make countless cuts within no time? If so, then I’d love to suggest this model from Milwaukee. Coming in a total of 60 teeth, this one right here can offer no less than 600 cuts in one charge, making it quite efficient and ideal for seasoned carpenters!
Like my previous model of Dewalt, it also has got dual bevel system to take your sewing skills to a whole new level. With its assistance, you can make both 45 and 48-degree cuts at once.
Speaking of the design, Milwaukee 2733-20 also appears comparatively lightweight. Weighing about 28.0 pounds, the overall structure seems to be compact for easy storage. And don’t worry about the cutting performance as it also features a 4-inch razor-sharp blade.
For a smooth and safe operation, the maker didn’t forget about adding a trigger (D-handle). Moreover, the effective LED shadow will ensure ultimate visibility, for which you can cut safely and more accurately.
Highlighted Features:
- Comes in 60 teeth to deliver about 600 cuts per single charge
- Friendly with 45 and 48-degree cutting angles
- It improves productivity with its brushless motor
- Able to make a variety of different cuts due to the dual bevel
Pros
- Makes it easy to transfer due to the lightweight structure
- Compatible with numerous cutting angles
- Blade changing is a snap
- Can be used by both beginners and professionals
Cons
- Blade break appears to be fragile!
Frequently Asked Questions (F.A.Q):
Is a 7 1/4 Miter Saw Worth It?
Of course, it is. These days, the 7 ¼ miter saw is gaining popularity for its extensive usage and functionality. For cutting wider boards with maximum precision, such saws are more effective than traditional ones.
Apart from that, the majority of 7 1 4 miter saws won’t hurt your wallet, meaning you can easily afford them to meet your requirements.
Who Makes a 7 1/4 Miter Saw?
There are so many top-notch manufacturers available when we talk about making 7 1 4 miter saws. Among them, Dewalt and Milwaukee are the two top-rated brands to give you some of the quality miter saws.In case you want to learn about the best 7 ¼ miters saw blade, where I’ve added the top 10 ultimate choices!
Which 7 ¼ miter saw is the most accurate?
As you can see, both Dewalt and Milwaukee earned gold standards in terms of ensuring accuracy while making bevel and crosscuts. That said, the Dewalt confirms more precision; the credit goes to the cutting line indication with a combination of cross-cut systems.
Dewalt Vs. Milwaukee 7 1 4 Miter Saw – Final Thoughts!
The battle of Dewalt vs. Milwaukee 7 1/4 miter saw ends here. I tried my best to let you understand what to choose for your projects. Each of them has its own unique specs and specialties. So it’s tough to consider any of them as a clear winner!But in my opinion, Dewalt is best for accuracy and power, while Milwaukee is known for its outstanding cutting skills as it can make 600 cuts with just a single charge.
Nowadays, many people are researching online for the appropriate angle grinder. They usually check their desired functions and needs on product specifications. But often, they get confused when it comes to the range of AMP!
So today, I’m here to compare 7 amp vs. 11 amp grinder machines and provide you with the information you need before choosing one. Here, I’ll let you know when you should choose a 7 or 7.5 amp grinder or when to get an 11 amp grinder. This might be your luckiest day, I guess!
What Amp Angle Grinder Do I Need?
In the current market, you can get many types of grinders with different features and benefits. A cordless DC grinder is available in the market, although it is not for heavy-duty jobs. On AC voltages, grinders are usually available in standard 120 Volt.
When it comes to the amp, you have to keep some compulsory things in your mind. For reference, I am comparing here 7.5 vs. 11 amp angle grinder. In terms of no-load RPM, 7 or 7.5 amp grinders provide you a speed of 10,000 rpm, while 11 amp grinders come with a speed of around 11,000 rpm.
On some average models of 11 amp grinder, you will get better control over speed. As a result, you will be able to decrease the speed to 7,500 rpm.
1. Power Deliver
When it comes to power tools, power consumption and power delivery are the most vital thing to be considered before buying one. A 7 amp grinder machine will consume about 840 watts, and it can deliver about the same power. While an 11 amp grinder will take 1320 watts of energy and also deliver about the same power.
840 watts is a reasonable power consumption rate when we talk about power tools. It’s also ideal for home usage, household work, and small projects. But if you are a professional, you have to do heavy-duty jobs. Then it’s not suitable at all.
In that case, you should go for an 11 amp grinder machine or more than an 11 amp machine. One of the heavy-duty jobs is grinding concrete; in this case, if you are looking for the best 7-inch grinder for concrete of high amp, then you may visit.
2. Motor
Generally, a bigger amp means a stronger motor. And obviously, a stronger motor will last longer than a weak motor. If you buy a 7 amp grinder and put so much pressure on the machine, then it may ruin the motor soon.
But if you just do day-to-day tasks, then it might be okay. It’s equally true that an 11 amp grinder motor is more powerful and can tolerate much pressure.
Frequently Asked Questions (F.A.Q)
Can you do the same work with both grinders?
Frankly speaking, no! You cannot do heavy-duty jobs with a 7 amp grinder. If you try to do so, it will ruin the project badly. But if you are trying to do regular tasks, then you are allowed to perform them with both grinders.
Can you cut aluminum with a 7 amp grinder?
A 7 amp grinder is best for regular tasks. I have mentioned earlier that it can deliver up to 840 watts of power. That’s enough to cut aluminum with your grinder machine.
Can I sand concrete with my 6 amp grinder?
For sanding concrete, you will not need much power from a grinder. So, a regular 6 amp grinder is ideal for your household work and sanding concrete.
7 Amp vs. 11 Amp Grinder: Final Words!
Comparing a 7 amp vs. 11 amp grinder is to let you know that if you are not a professional, you can easily go for the smaller ones (7 amp). On the other hand, an 11 amp grinder should be your ultimate go-to to deal with heavy projects!
These days, impact drivers are one of the most famous cordless power tools on the earth for both professional and hobbyist craftsmen. And when it comes to brand, the chapter can’t close without mentioning the giant brand named “Milwaukee!”
That might be the reason why people often get confused about Milwaukee’s M12 vs M18 impact driver. They can’t find out which is the most suitable for them. Now, we are here to assist you. So, just wave off your worries!
Here, we will compare the tools in almost every aspect, including motor, speed, battery power, maximum torque, usability, etc. So, stay tuned till the end.
Milwaukee M12 vs M18 Impact Driver
Here, we will compare Milwaukee impact driver M12 vs M18 head to head. From the type of motor to torque, every single detail we will compare here, what exactly you do need. So, without further ado, let’s jump into the details.
Motor
Impact drivers generally feature 2 types of motors to choose from. We prefer brushless motors over brushed motors. Because the brushless one produces relatively less heat during operation. And also saves battery energy and gives you a better battery backup. Furthermore, brushless motors also last longer compared to brushed motors.
Milwaukee impact driver M12 comes with a brushless motor. That is a plus. On the other hand, M18 features a brushed motor. This is a four-pole motor and gives you more power.
Alongside that, the motor of M12 is 12V while the motor of M18 is 18V.
With M12’s brushless motor, you can expect longevity of the power tool and better battery life.
Speed
In a word, the speed is in the RPM metric. When comparing Milwaukee m18 vs. m12 impact driver in speed, we can see that the m18 comes with a speed of 2750 rpm. On the flip side, m12 features 2650 rpm.
Both drivers have only two-speed options, low and high. There is the only difference of 100 rpm, which is a pretty small distinction. But when you think professionally, you can get many advantages of just 100 rpm.
If you’re trying to sink screws on any hard materials, you can feel the difference of just a 100 rpm, yep!
That said, most people don’t need the extra speed until they do some project that includes hard materials.
If you want to buy an impact driver for just home projects, you don’t need to hurt your wallet for the M18.
Torque
Torque is the heart of any impact driver. This is one of the main factors you should focus on. All you need is the torque from pushing a stubborn screw to come out of a hard surface.
M12 delivers 1200 inch-pounds of torque. This is the highest torque among all 12V impact drivers. On the flip side, M18 has 1500 inch-pounds of torque. The extra 300 torque is possible for the 18V battery.
As you can see, M18 is more powerful than the small M12. But there is a question, who needs the extra torque? Well, for household projects, 1200 inch-pound of torque is enough. But if you are a professional and you need a heavy-duty impact driver, then M18 is the go for you.
IPM
Another essential thing is IPM. It is measured by how many hammer-like blows the impact driver delivers to help the tool for driving and pulling out the screw. Comparing the Milwaukee m12 fuel vs. the m18 impact driver, we found that the m12 comes with 3550 IPM, while the m18 features 3450. As a result, if you want to work for a long, you should choose m18.
Product Weight
When it comes to portable tools like an impact driver, weight is a compulsory factor to consider. With battery, the M12 is around 2.6 pounds. That is much good if we compare it to its competitors. People can use impact drivers on the one hand and often in an awkward position, so lightweight is obviously a plus.
On the other hand, M18 is around 3.1 pounds, which is a bit heavier. So, if you don’t need the extra power and torque of M18, then you should go for M12.
Battery
M12 supports 12V batteries with a capacity of 1.5, 2, and 3 amp-hours. Further, you can get a heavy-duty battery of 3, 4, and 6 amp-hours. The M12 batteries are very versatile and come with overload protection.
The batteries also come in a rubber base, which helps the stability of the battery when they are not in use.
When we talk about M18, it supports an 18V battery of three types: Red lithium CP, Red lithium XC, and Red lithium Demand. The Redlink batteries are known for their high performance. They are suitable for heavy-duty purposes.
Best Milwaukee M12 Impact Driver: My Recommendations
1. Milwaukee MLW2553-20 M12
Milwaukee MLW2553-20 M12 Fuel Hex Impact Driver is a top-rated impact driver in budget. It is about 2 pounds in weight and 3 x 7 x 8 inches in size. Isn’t it too handy? Yep, your hands can grip it strongly and easily. It comes with a maximum of 800 watts of power.
Another interesting feature is that it comes with four-mode speed control! So, you have more control over its speed and power. The MLW2553-20 M12 can deliver up to 1300 inch-pounds of torque. Further, it supports only 12V batteries.
Note: To get familiar with the best impact driver under 100, you can check the link.
2. Milwaukee 2598-22
What if you get a complete package that features everything you need, from a superior impact driver to lithium-ion batteries? Yes, this is what you can get from this wonderful model of Milwaukee.
Weighing only around 9.0lbs in total, you’ll find each of these hammer drills so easy to hold in order to perform household projects. Besides that, you’re getting a portable bag to transfer them with ease from place to place. Inside the box, a combo pack of power tools, 2 pieces of batteries, and pneumatics will be available.
Best Milwaukee M18 Impact Driver: My Recommendations
1. Milwaukee 2656-20
This top-rated M18 impact driver comes with a beautiful LED lighting array and 1500 inch-pounds of torque. The top speed it offers is 2750 rpm. Isn’t it impressive?
Moreover, The Milwaukee 2656-20 M18 offers 3450 IPM with 800 watts of power. And what about the weight? It’s only around 2.65 pounds, which is relatively lightweight in the M18 series. Lastly, it supports only 18V batteries.
2. Milwaukee 2760-20 M18
The Fuel Hex Hydraulic Driver from Milwaukee equips a handy size. Just about 9 x 6 x 5 inches. It features four-mode speed control to choose from, so you have better control of speed. The maximum output it can provide is 800 watts. Milwaukee 2760-20 M18 supports only 18V batteries.
It weighs about 2.81 pounds, making it incredibly lightweight. I think it is more than enough for the day-to-day task of home and small projects.
Frequently Asked Questions (F.A.Q)
Which is better, Milwaukee m12 or m18?
In terms of performance, M18 is the winner. But it’s equally true that M12 is versatile. So if you want to get an impact driver for household works or small projects, then M12 is your good to go. On the flip side, if you need a heavy-duty tool, then you should go for the M18.
What’s the difference between m12 and m18?
In a nutshell, M12 has a Brushless, and M18 has a Brushed motor. Speaking of the overall functionality, M18 can provide higher performance and higher torque compared to M12, while M12 is lightweight and has better longevity.
What if the drill bit gets stuck in my impact driver?
From using pliers to wires, there are two effective ways available in terms of getting a stuck bit out of your impact driver.
Wrap Up!
In this writing, I’ve compared the m12 vs. m18 impact driver in every aspect. Motor, Speed, Torque, Power, and Battery are all the necessary topics I’ve included in the article. So I believe that now you have a clear idea about both power tools, and you can choose what exactly you do require.
Good luck!
Cutting aluminum is not an untroubled task. All you need is precise knowledge of blade and method. Any blunder can ruin your expectations. Even any careless attempt while cutting aluminum can cause serious injury.
So, knowing how to cut 1/8 inch aluminum can give you a perfect outcome. 1/8-inch aluminum width is pretty thick. Hence, read this article and weld it more if you have a base idea and experience cutting 1/8 aluminum blades.
If you plan to do it for your home renovation or any other work, you must be confused among the multiple options. After abundant exploration, I have found the 2 ideal cutting options for 1/8 inch or 0.125 aluminum sheet.
So let’s get into it!
Best Way to Cut 1/8 Aluminum: 2 Effective Methods
Thick aluminum is a rigid material, and it’s better to use an electrical tool to cut it. You don’t need to push too much effort into these machines. Now let’s dig into the deep to know how to cut 1/8 inch aluminum sheet facilely.
1. Cutting 1/ 8 Aluminum with Angle Grinder
The angle grinder can cut rugged aluminum precisely. But you have to choose the appropriate blade disc for the process.
Choosing the Right Blade:
If you want a satisfactory result, there is no other option to select the best blade, as a good valued blade can give you long-term service. It can give your 1/8 aluminum sheet any shape you want. So, if you are thinking that getting an expensive blade can cost you more, open the palm and pay for it.
Proper Disc Attachment:
Before starting the machine, ensure you have attached the disc appropriately and the bolts are tight enough. Priorly, you can practice on the corner of the sheet, which part will be a waste after the cutting.
Don’t Force It:
Never forcefully try to cut the sheet as it can cause sparks and can even break your blade into pieces. Always move the grinder smoothly. You can use lubricants to keep your blade heatless.
Start Cutting:
Once you begin the cutting process, try to finish it; if you stop it in the middle, the next when you begin, it can push forward and cause a poor design finishing result.
2. Cutting 1/8 Aluminum with Miter Saw
A miter saw can do it all, from cutting aluminum gutters to 1/8 aluminum! You just have to select the correct blade and proper allocation for a good result.
Choosing the Right Blade:
Choosing the right blade for a miter saw aluminum is vital. Circular blades, Razor blades, and sharp cut blades are a few good blades for aluminum cutting. Attach the blade with the saw adequately, check twice to stay risk-free from any unwanted accident.
Proper Clamp Attachment:
Clamp the aluminum tightly, and it’s essential to get an exact result. Make sure that the aluminum sheet doesn’t move a bit.
Safety Precautions:
Try to maintain minimum safety as the accident aluminum piece can hit your face and cause a deep wound. So, wearing glasses and gloves is a must.
Begin the Cutting Process:
Start the machine with enough safety and wait for the desired outcome when you are ready.
F.A.Q.’s on How to Cut 1/8 Inch Aluminum
What to choose for cutting thin aluminum?
In a nutshell, you can use an angle grinder for thin aluminum cutting.
Is it safe to cut aluminum by hand?
The answer is yes, but this process is very time-consuming, and you will probably not get a satisfactory result.
What type of lubricant is suitable for the miter saw blade?
Saw wax, standard wood oil are good for miter-saw it will prevent sparking. It also helps to keep the splinters from spreading.
Last Words!
Always maintain safety precautions while cutting aluminum because any accident through power tools can cause a deep wound. And as I’ve walked you through how to cut 1/8 aluminum following two different methods, I guess this task becomes a piece of cake, right?